
BitBucket Continuous Integration Options Compared

How do you rapidly deliver new features without delivering bugs at the same rate? By running automatic builds and tests on all of your code before it gets into a release. And that’s exactly what continuous integration is.
To run these automated code checks, you’ll need to keep your code in a repository. There are a lot of options, but if you’re already using Jira, then Bitbucket is a natural choice. Beyond good integration with Jira, Bitbucket offers integrations with a lot of build systems.
In this article you’ll see how to connect a few of these build systems to a Bitbucket repository. You’ll also see how to set up jobs in those build systems to run unit tests on your commits.
If you want to see all of the build pipeline configurations, I’ve made a publicly available project here.
Using Bitbucket with Jenkins
Jenkins is a free, open-source build server. It allows you to define build jobs, store build artifacts, and run deployments, all of which run on your own servers.
Jenkins is a great option if you need to run builds on a customized machine. A good example of this is building iOS apps. On the flip side, however, is that since Jenkins isn’t a managed service you have to manage your own infrastructure to run builds. This can be a lot more costly than some of the alternatives, especially if your builds don’t run that often or for very long.
Connect Bitbucket to Jenkins
Another benefit of the Jenkins community is that someone has probably already solved whatever problem you may run into and has created a plugin for it. The plugin to run builds from Bitbucket is called Bitbucket Server Integration.
The plugin’s page has details about how to get it setup. The short version is that you install the plugin, then add your Bitbucket server from Jenkins’s system configuration panel. After your server is added, create a pipeline and select your Bitbucket server as the source.
Configuring Your Build
Once your pipeline is set up, you’ll need to tell Jenkins how to actually verify your code. You can do this using a specially formatted file called Jenkinsfile in your project’s root directory. The following example runs some Jest unit tests in a Node project.
pipeline {
    agent any

    stages {
        stage('Test') {
            steps {
                sh ‘npm install’
                sh ‘npm test -- --ci’
            }
        }
    }

    post {
        always {
            junit 'test-reports/junit.xml'
        }
    }
}
What’s the Cost?
It’s actually difficult to determine the cost of Jenkins. The software itself is free, so you won’t be paying any licensing fees. You will have to pay for any cloud instances that you run it on though. Or you could even make use of on-premises servers, and you’d just be paying your power bill.
Integrating Cloud CI/CD Tools with Bitbucket
If you’re already using a cloud provider to host some of your applications, you can take it a step further and use those cloud resources to validate your code.
First, set up Bitbucket to alert your cloud provider when changes have been made. This can be done with a webhook. Webhooks are just a REST endpoint that a service can send a request to when something happens. In this case, Bitbucket will send a request to your cloud build system letting it know that you’ve made changes to your code.
Connect Bitbucket to AWS Developer Tools
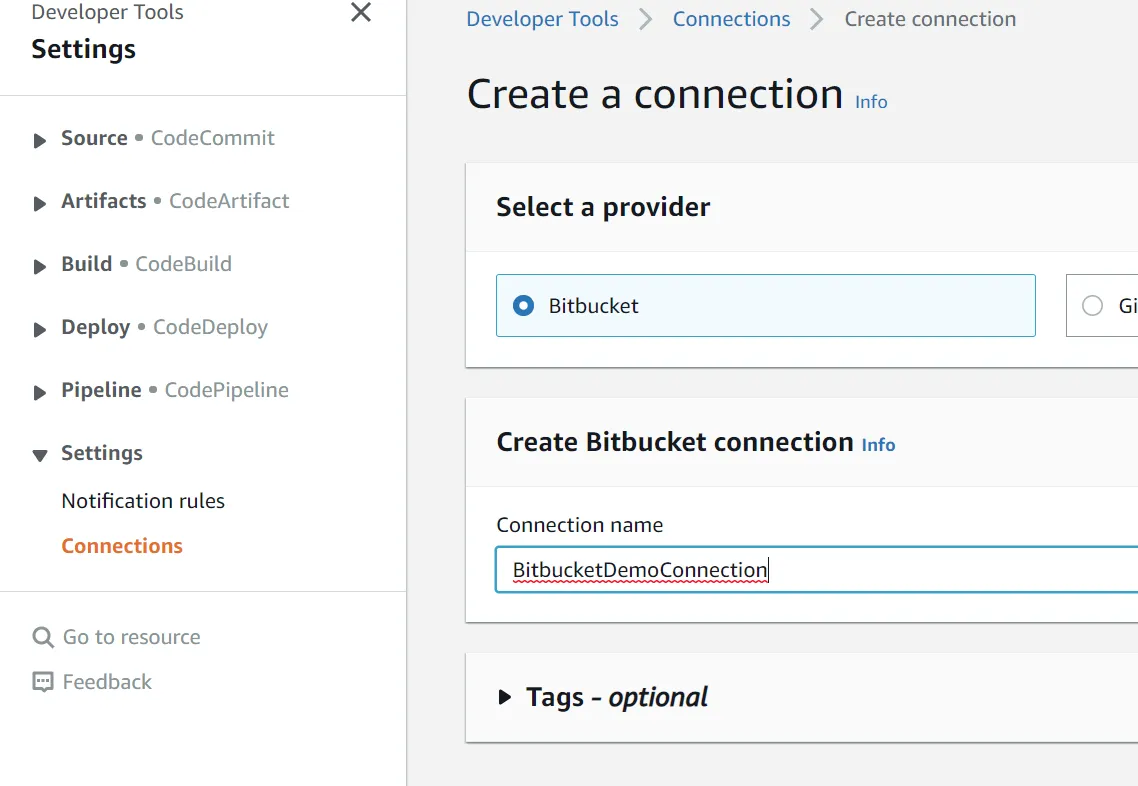
To set this up in AWS, go to Developer Tools, then click Settings > Connections. You’ll see a list of your current connections. Click the big orange Create connection button.
On the next screen you’ll be able to select your provider—Bitbucket, in this case—and provide a connection name. Fill in the name and click Connect to Bitbucket.
AWS uses a Bitbucket app to handle authentication with your repository. The next screen allows you to select an existing app or create a new one. If you click Install a new app, an OAuth flow will start. After you’ve installed the app and saved the connection, you can create a new pipeline.
Create a Pipeline
When you create a new pipeline, the source step will ask what provider hosts your code. Select Bitbucket, then select the connection you just created from the next dropdown menu.
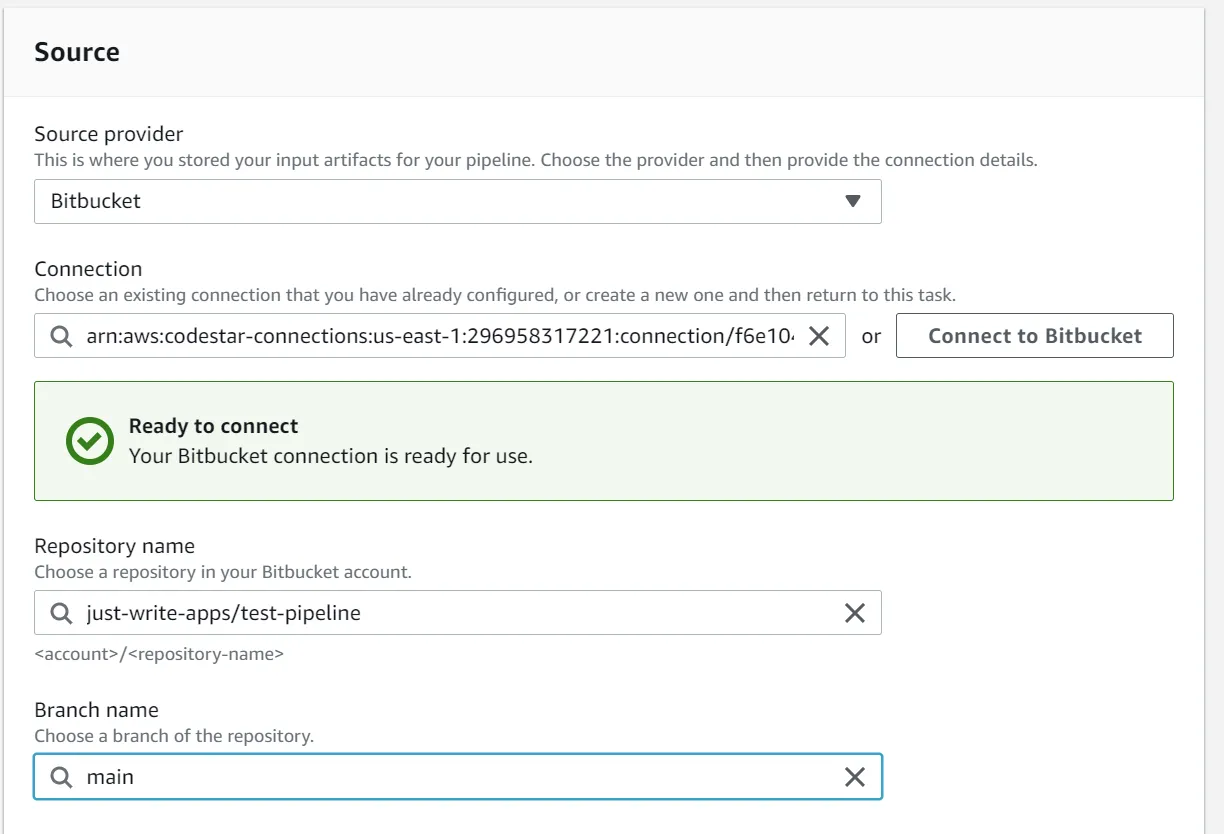
Next, select the repository and branch that you want this pipeline to build. Make sure the checkbox to start the pipeline on code changes is checked, then click Next. The rest of the steps are pretty straight forward, just make sure you select CodeBuild as your build provider when asked.
Configuring Your Build
Now that your pipeline is set up, you’ll need to configure how CodeBuild will run. To do this, add the following content into buildspec.yml within your project’s root directory.
version: 0.2

phases:
  pre_build:
    commands:
      - npm install
  build:
    commands:
      - npm test -- --ci

reports:
  unit-tests:
    files:
      - "*.xml"
    base-directory: 'test-reports'
    file-format: "JUNITXML"
What’s the Cost?
Code pipelines are billed at a rate of $1 for every pipeline that runs during a month. You can also get some costs from storing artifacts in S3. To get all the details, see the AWS CodePipeline pricing page.
In addition to the pipeline cost, you’ll need to pay for any build time that you’re using in CodeBuild. You can get your first 100 minutes free if you use the lowest powered instance type. If you need more power than general1.small offers, you’ll have to balance between cost and performance.
There are currently six build instance types available. The more powerful instance types do cost more per minute, but they can also decrease the number of minutes to build. Assuming your build job can run in Linux, here’s how much you’d pay for 200 build minutes per month (pricing and availability can vary depending on your region). For more details see the AWS CodeBuild pricing page.
| Instance | Cost |
|---|---|
| arm1.small | $0.68 |
| general1.small | $1.00 |
| general1.medium | $2.00 |
| arm1.large | $3.00 |
| general1.large | $4.00 |
| general1.2xlarge | $40.00 |
| gpu1.large | $130.00 |
Native Support of CI in Bitbucket
If you want to keep your entire workflow on the same system, Bitbucket offers its own CI/CD service, appropriately called Bitbucket Pipelines. All you need to do is create a YAML file in the root directory, and Bitbucket will detect it and execute whatever jobs you have defined.
There are several benefits to using an all-in-one setup like this. You don’t have to set up communication between multiple systems. The only configuration required is managed in your project’s source, and you can show reports from continuous integration testing right in your pull requests.
Creating a Pipeline
The configuration for Bitbucket Pipelines is stored in bitbucket-pipelines.yml in the root of your project. This file will define all of the stages, jobs, artifacts, and reports that you want to be a part of your pipeline. The following sample will run your Jest unit tests and store the results.
image: node:14-slim
pipelines:
pull-requests:
"**":
- step:
caches:
- node
script:
- npm install
- npm test -- --ci
artifacts:
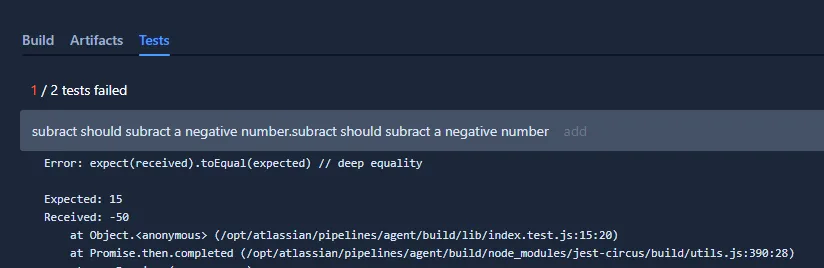
- test-reports/**Now if you introduce an error in your pull request, you’ll see a failed build in the right sidebar. Clicking on the title of the pipeline will take you directly to the test results page.
What’s the Cost?
Bitbucket pipelines are charged based on the number of minutes used per month. Depending on your plan, you get between 50 and 3500 build minutes per month. If you need more minutes, you can buy them at a rate of $10 for 1000 minutes. For the most up to date pricing, see the Bitbucket pricing page.
Conclusion
In this article you’ve seen that Bitbucket provides many ways to run a CI workflow. Each one has its own areas where it outshines the rest. Ultimately you’ll need to decide what’s important to your project before committing to one method over another.